


Meta Quest 2 has been taking the Virtual Reality (VR) world by storm and is known for its user-friendly setup, immersive gaming experiences, and affordability. For PCVR enthusiasts, the capacity of Meta Quest 2 goes beyond its standalone VR capabilities. The Headset can connect to your PC, enabling you to enjoy VR games and applications that were previously limited to high-end, PC-tethered VR headsets.
Part 1: Get to Know Your Meta Quest 2
Before we delve into the process of setting up your Meta Quest 2 for PCVR experiences, it’s essential to understand what you’re working with.
Unboxing the Meta Quest 2
When you receive your Meta Quest 2, the package will include the following items:
- Meta Quest 2 headset
- Two touch controllers
- A spacer for glasses wearers
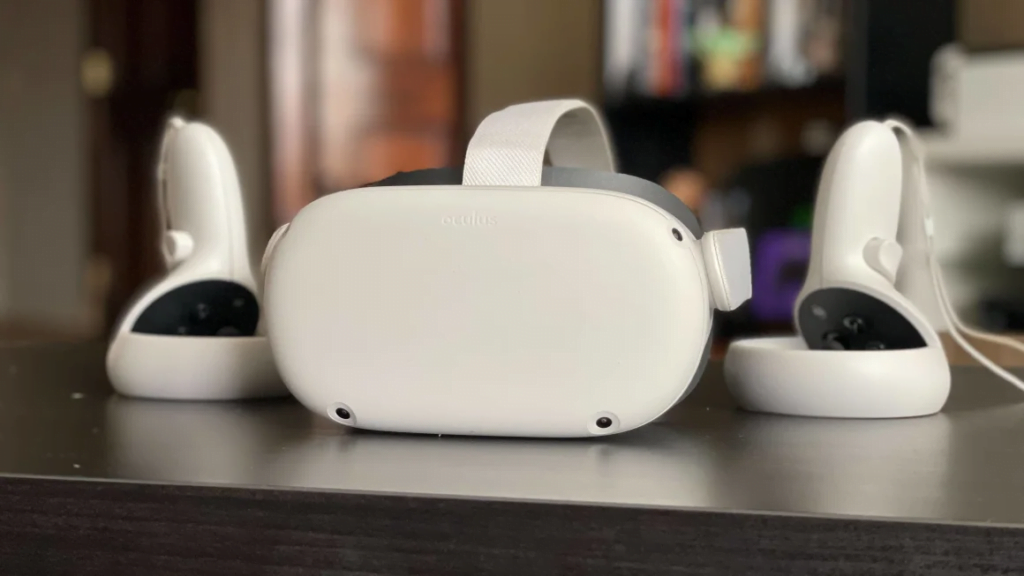
The Headset is the heart of your VR experience, functioning as both a VR display and a compact computer. The touch controllers held one in each hand, tracked your physical hand movements, and translated them into the virtual world.
Powering Up and Pairing Controllers
To start your VR journey, you’ll need to power up the Headset and pair it with the controllers. Here’s a step-by-step guide:
- Press and hold the power button on the Headset for about two seconds until you hear a sound indicating it’s turned on.
- Once powered up, pick up your controllers and squeeze the triggers to initiate the pairing process.
Part 2: Preparing for the PCVR Journey
To connect your Meta Quest 2 to your PC and unlock the wider world of PCVR experiences, you will need to complete a few preparatory steps.
Downloading the Meta Quest App
First, you’ll need to download and install the Meta Quest app on your smartphone. This application allows you to manage your Quest 2 experience when you aren’t in VR. It also includes a store for purchasing new Quest games and provides access to parental controls if needed.
Steps to set up the Meta Quest app:
- Download and install the Meta Quest app for Android or the Meta Quest app for iOS.
- Sign in with your Facebook/Meta account.
- Choose a username to use with your Quest and set your preferred privacy options.
- Optionally, enter a credit card for future game purchases.

Checking PC Requirements
To use Meta Quest 2 with your PC, make sure your system meets the following requirements:
- Operating System: Windows 10 or Windows 11.
- Processor: Intel i5-4590 / AMD Ryzen 5 1500X or greater.
- RAM: At least 8GB.
- GPU: Most Nvidia GPUs from the 970 series and higher or AMD 400 series and higher GPUs.
Part 3: Linking Meta Quest 2 to Your PC
Now that you’re all set with the Meta Quest app and your PC is ready, it’s time to connect your Meta Quest 2 to your PC. There are two ways to accomplish this: via a USB-C cable (Link Cable) or wirelessly using Air Link.
Using a Link Cable
Connecting your Meta Quest 2 to your PC using a Link Cable is straightforward but will tether you to your computer, limiting your movement. Here’s how to do it:
- Make sure your Meta Quest 2 is turned on.
- Open the Meta Quest app, select “Devices”, and then “Add Headset.”
- Select “Quest 2” and then “Link (Cable)” as the connection method.
- Connect your Meta Quest 2 headset to your PC by plugging one end of the cable into your headset and the other end into your PC.
- Follow the prompts on the Meta Quest app to finalize the connection.
Using Air Link (Wireless)
If you prefer a wireless connection for a more unrestricted VR experience, you can use the Air Link feature. Here’s how:
- Ensure that both your Quest 2 and your PC are on the same 5GHz Wi-Fi network.
- Open the Meta Quest app on your PC, select “Devices”, then “Add Headset”.
- Select “Meta Quest 2” and then “Air Link (Wireless)” as your connection method.
- Follow the prompts in the Meta Quest 2 headset and the Meta Quest app on your PC to complete the pairing.
Part 4: Exploring the World of PCVR
Great news! You can now enjoy PCVR games on your Meta Quest 2 headset. This means you can play popular VR games like Microsoft Flight Simulator, Half-Life: Alyx, and Star Wars: Squadrons.
You can control your PC through the Headset and its controllers, opening a whole new way of interacting with your computer. And if you want to share your VR experiences with others, you can cast your Meta Quest 2 on a TV.

Part 5: Tips for a Better PCVR Experience
To enhance your PCVR experience, consider these tips:
- Regular Breaks: Regular breaks help prevent discomfort and promote a healthier VR experience.
- Free Games: Start with free games like Horizon Worlds or VR Chat to familiarize yourself with VR.
- Comfortable Games: Consider starting with games marked as “Comfortable” in the Quest 2 store.
Conclusion
Meta Quest 2 is undoubtedly a game-changer in the VR landscape, and its ability to connect with a PC for a wider range of PCVR experiences makes it even more exciting. Follow the steps outlined above to set up your Meta Quest 2 for PCVR, and enjoy exploring new virtual worlds!
Enjoy your PCVR journey with Meta Quest 2!